Jasper is my beloved red bicycle. No matter how many times I leave him out in the rain, Jasper is ready and willing to take me where I need to go except when he has a puncture.
After looking more closely at the back wheel, more than one person has asked if Jasper is a fixie. He is not! He has a super nifty internal gearbox. A gearbox which, as far as I could tell you for my first six months of bike ownership, is controlled by black magic and powered by the souls of previous owners.
Thanks to the Broken Spoke, I took a class in this black magic, by which I mean Sturmey Archer 3-speed hubs. This was my first course at the Co-op, and even though it’s listed as an advanced course, it stands almost entirely on its own and can be taken “out of sequence”. The four of us found it mentally exhausting for, after disassembling and reassembling the hub once, we were tasked with using our knowledge of the individual components to explain how the hub changed gears. But, we succeeded, and found the process more rewarding for having not been given the answers.
Back to Jasper. As is the nature of poorly-maintained bikes, he had a very idiosyncratic mixture of clicks, rattles, and rasps, which I worked through piece by piece. While waiting for the glue to dry on a patched tube, I decided to put my at-the-time reasonably fresh knowledge to the test and take the already removed wheel to bits!
My photos do not provide anywhere near a comprehensive set of instructions, but for the extra-curious, there is a nice instructional video here. You’ll notice that the mechanic in the video starts with a bare hub, while I start with an entire wheel, but the process is the same – I just have a few extra starting steps. While I could also remove the hub from the wheel, it’s not at all necessary for this and a hub strip is already a time-consuming process, so I will leave the highly ambitious “combination hub strip and complete wheel reassembly” to someone with a lot of time on their hands.
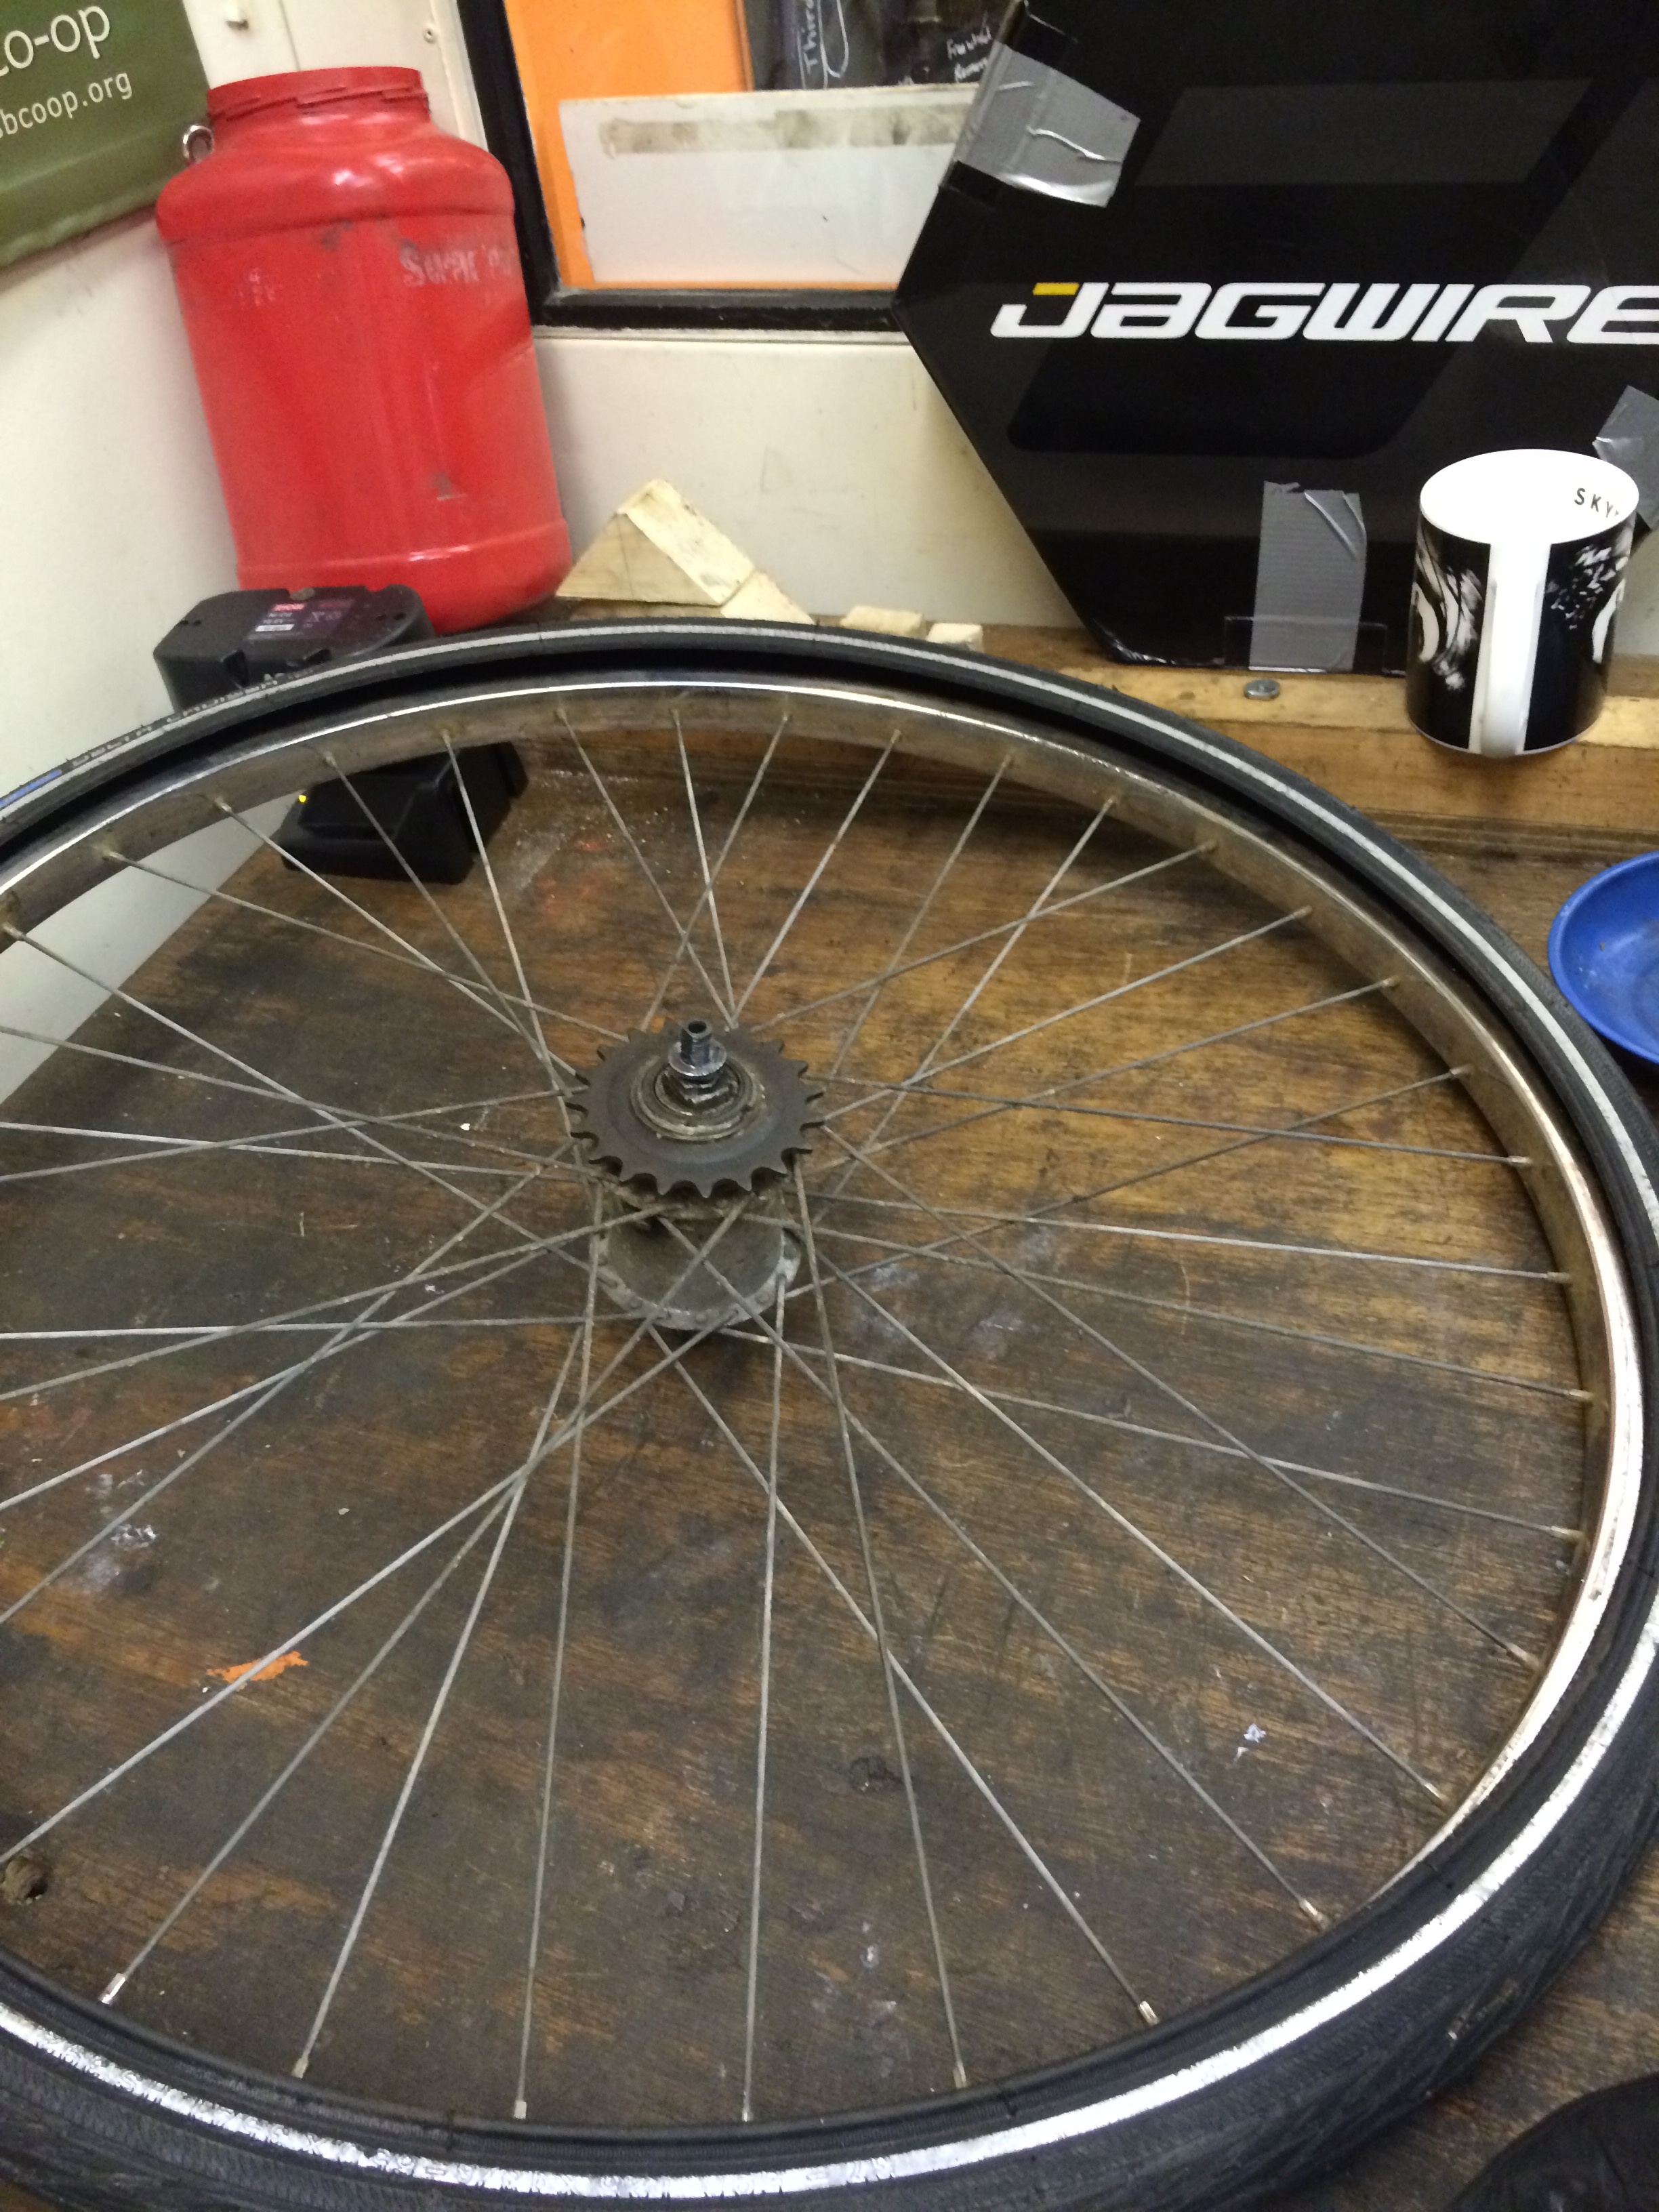
The innocent wheel. It has no idea what lies in store (but, looking at this photo, degreaser should be involved). The next several minutes consisted of removing nuts, washers, and a few other odd bits; it is, in my humble opinion, the dullest part of the entire process, which is why I’ve done the photographic equivalent of fast-forwarding and not included it.
Once the cones are off of both sides, out come the cool-looking internal bits: in this photo, I’m pulling away the sprocket and a few still-attached pieces to expose the ball ring, one of three sets of bearings. Already removed and not pictured are a spring and a silly-looking plastic cap, without which the bike would neither change gears nor go forward.
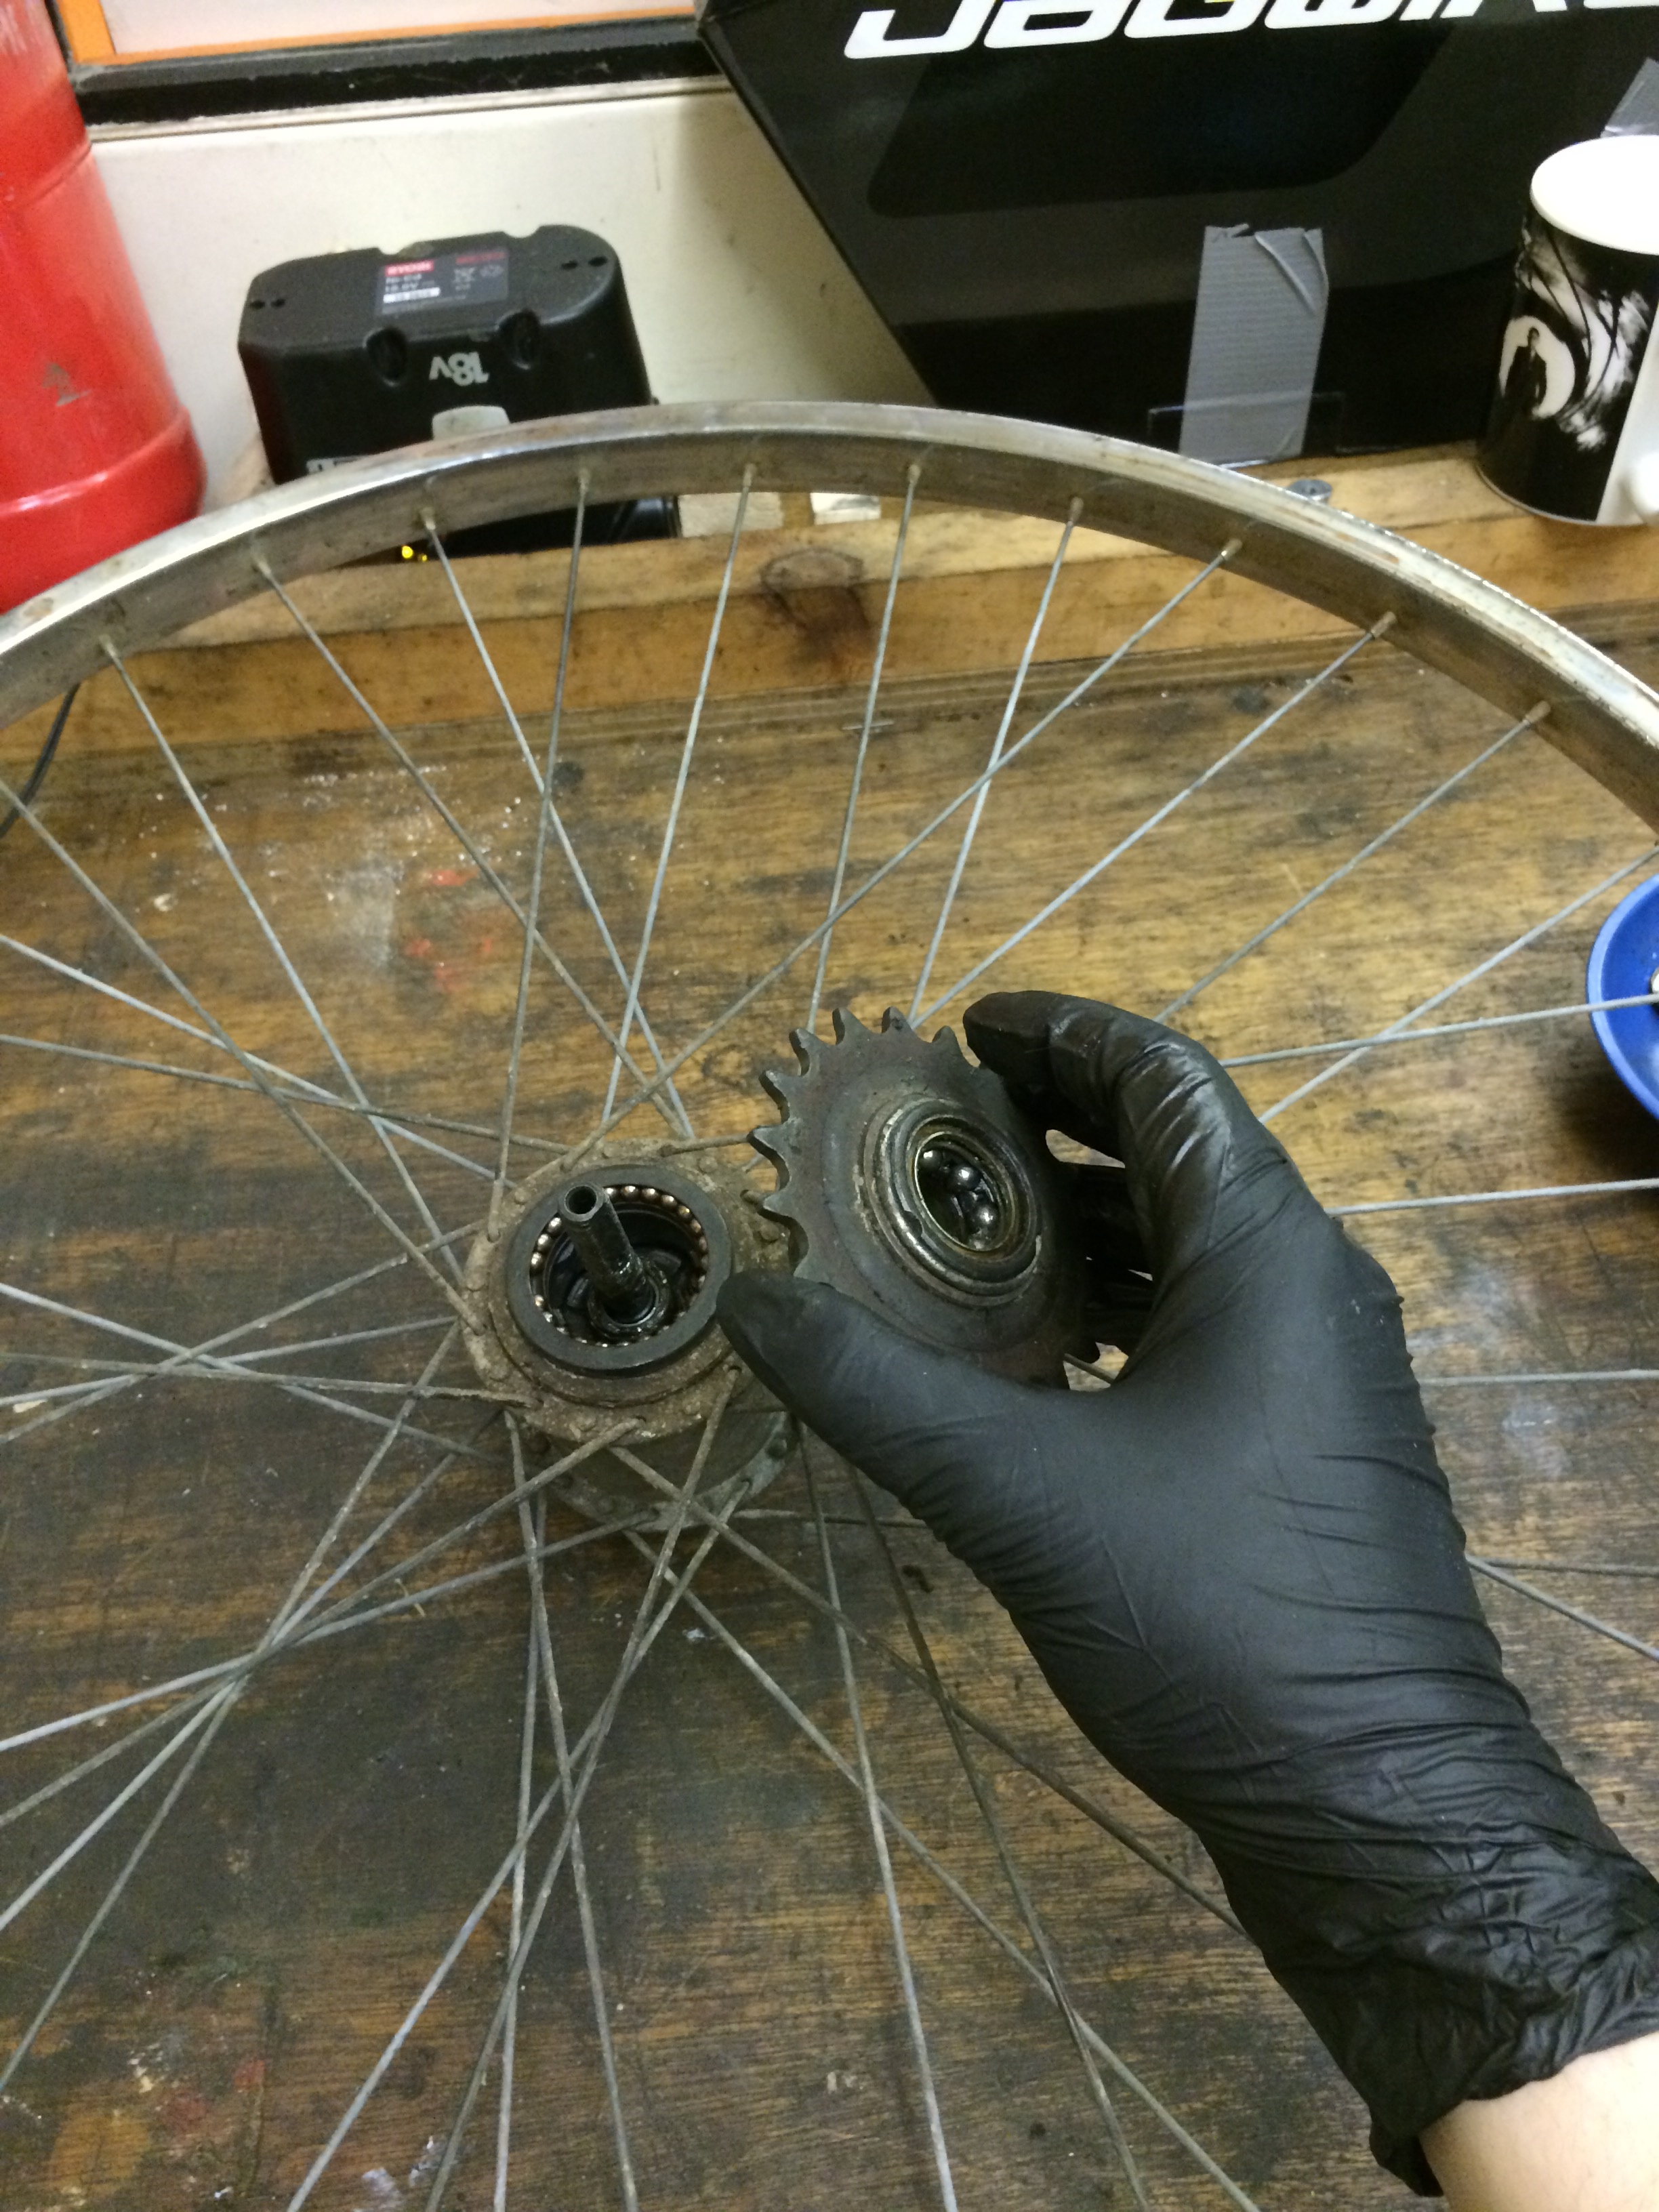
Now for the EXTRA-exciting part: a solid grey lump of insides! (The third set of bearings I mentioned earlier is also visible.) The components inside the hub tend to be grouped into large discrete chunks, but rest assured, there are still more tiny bits hiding inside.

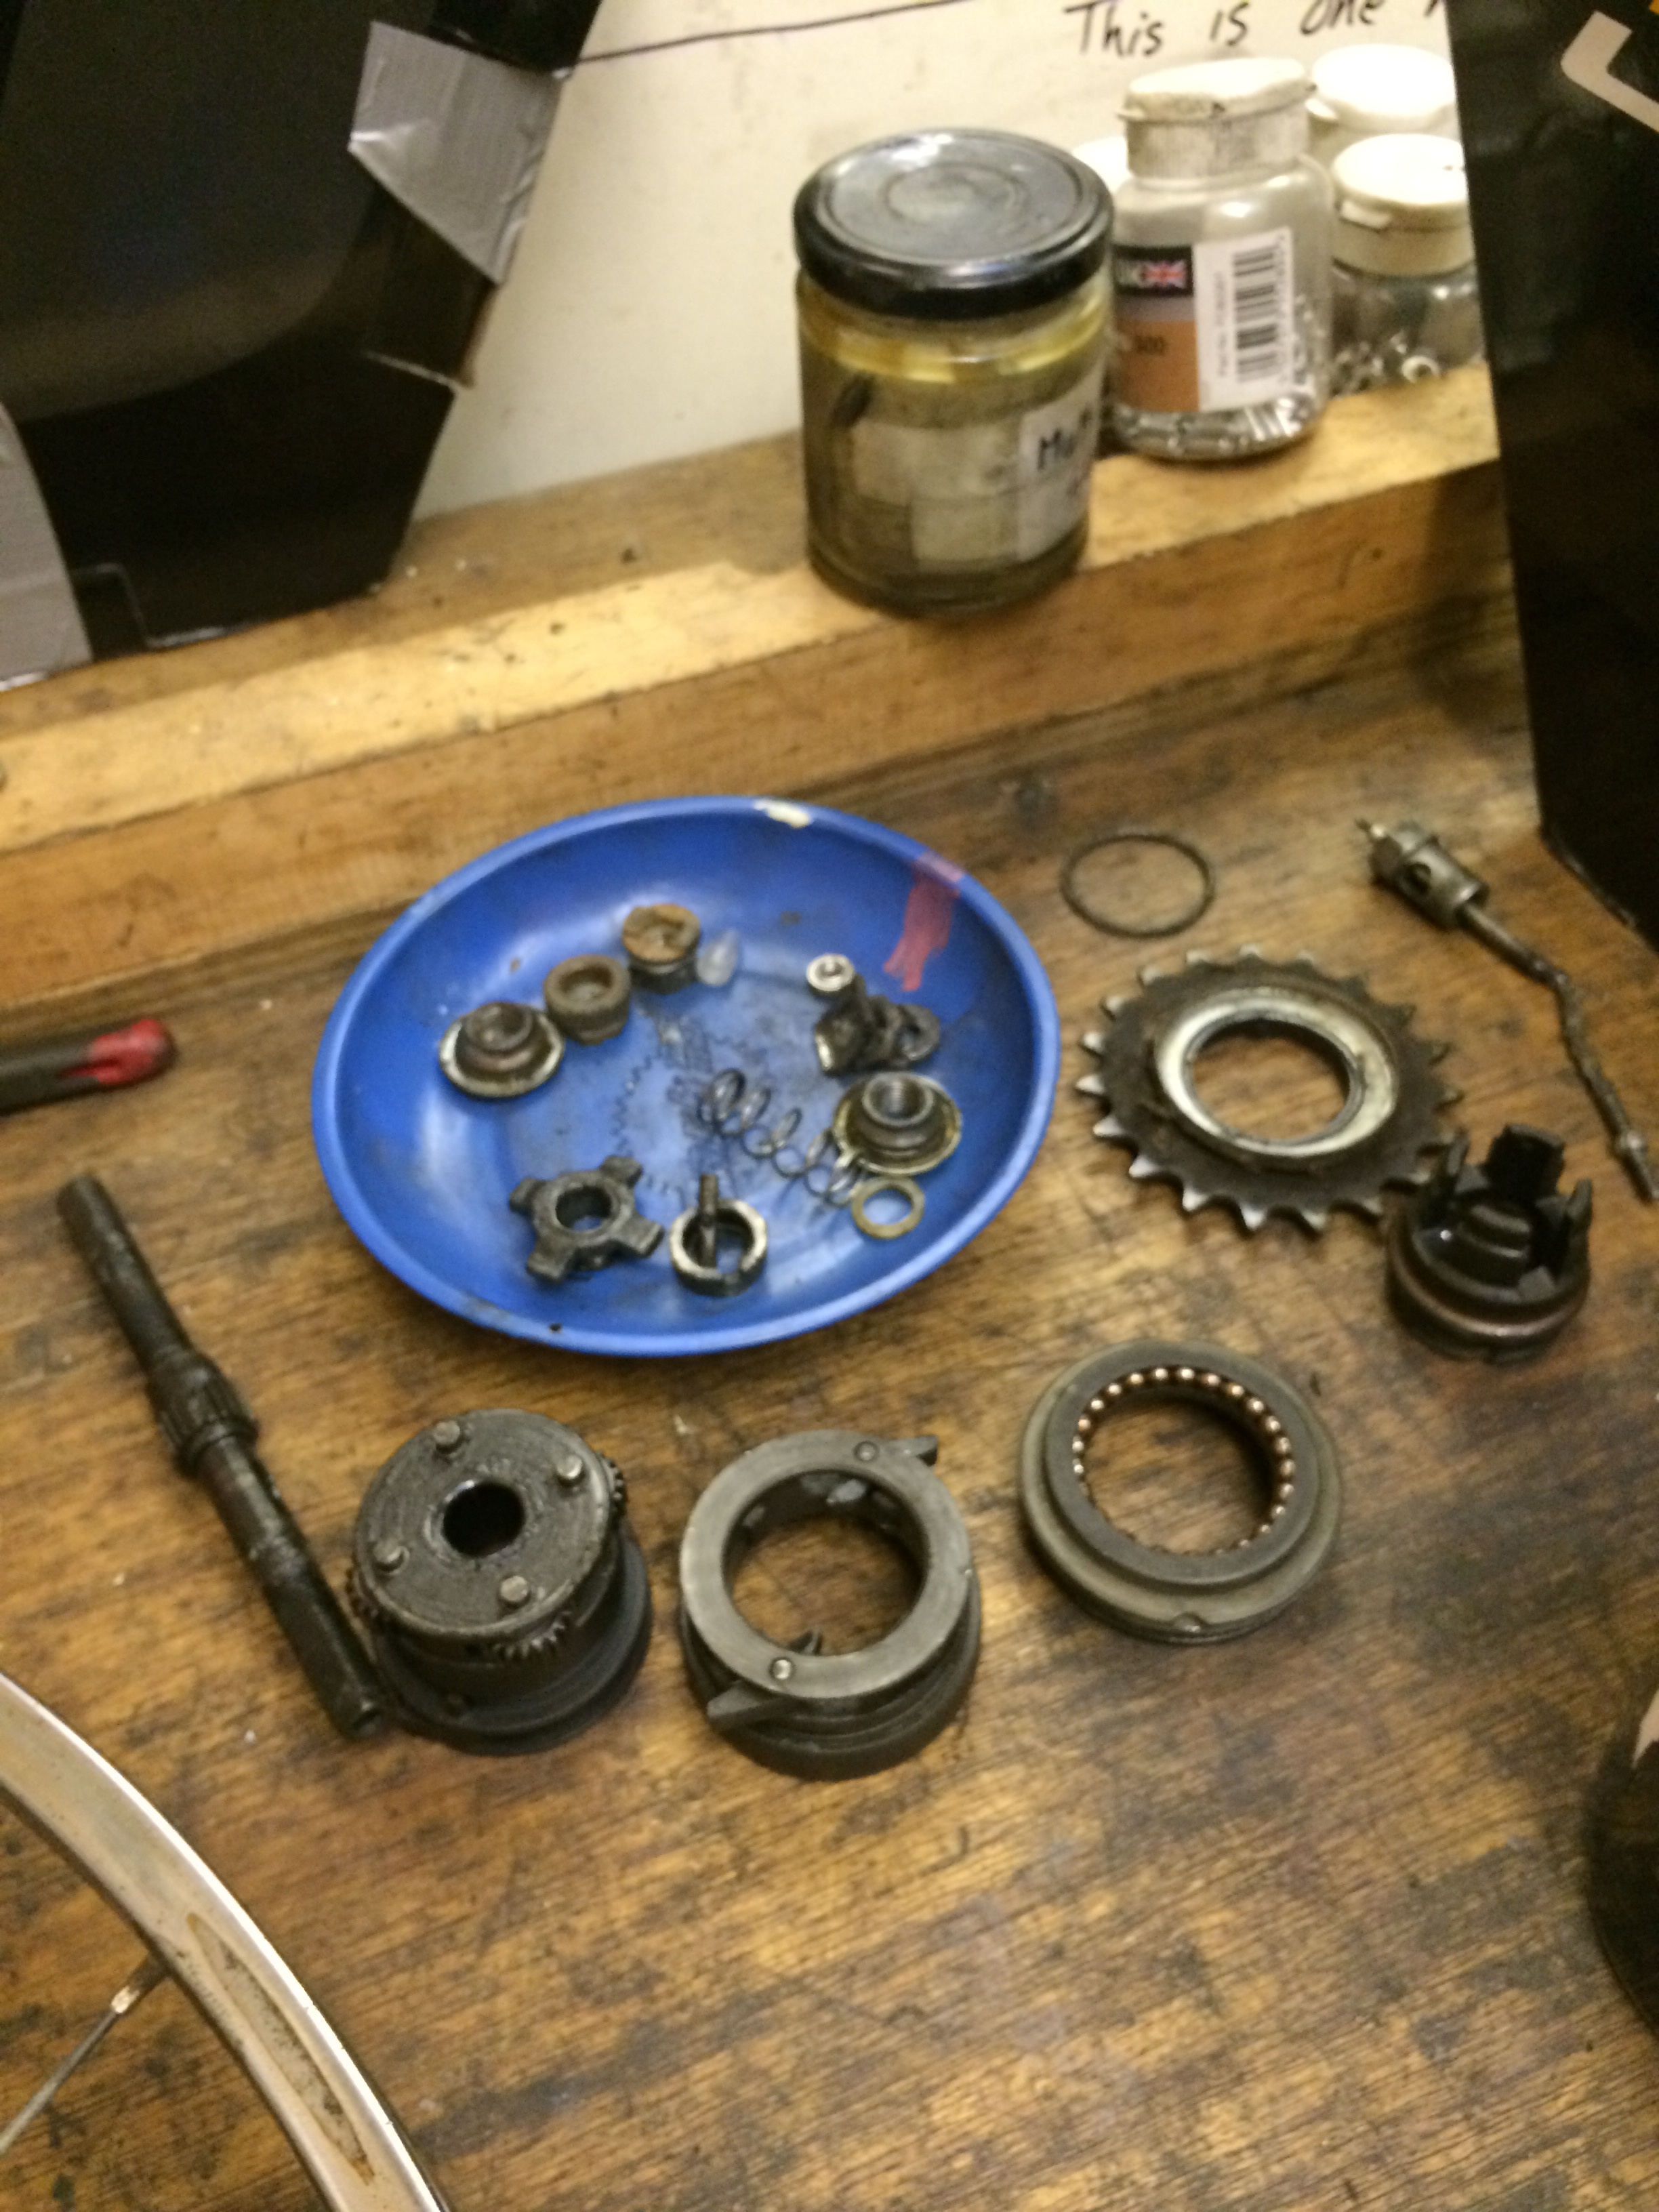
The solid grey lump splits nicely into the two largest pieces in the bottom row: the planet cage (left) and gear ring (right). Notice, if you can see it amongst the pre-cleaning muck, the tiny little cog on the axle: this is the sun. As you pedal and the axle rotates, the four little gears (planets) rotate and move the gear ring with it, but faster than the planet cage. It’s this discrepancy that provides an important clue as to how the bike changes gears.
This is roughly the point at which I started the lengthy process of cleaning and reassembly; I don’t have any images of the really tiny pieces (the planets come out of the cage quite easily, for example) as my hands were by then thoroughly covered in hub grease. Tragically, my first solo hub strip ended ignominiously, as I left out a spacer and was consequently unable to cycle home; fortunately, I was able to reposition the piece and cycle off the next day.
I will leave you with a practical tip for hub owners facing a vexing but simple problem: I’ve met several people, including myself, who have had their bike fall out of gear while they’re cycling, leaving them fruitlessly spinning the pedals. I know I ignored the problem, fearing it was some thorny issue in the deepest darkest depths of my hub. It may not be! It may be a simple matter of gear cable adjustment.
To simplify the process egregiously, the bike changes gears by sliding the clutch (the four-flanged nut in the bottom left of the blue tray) along the axle: to the left (inward) for higher gears and to the right (outward) for lower gears. Between second and third gear, there is a space where the clutch isn’t grabbing anything, so if the bike is between these gears, you won’t go anywhere no matter how hard you spin the pedals. Sometimes – in my case, because my back wheel was not properly affixed and was sliding forward! – the gear cable is or becomes incorrectly calibrated, causing the clutch to be slightly too far to the left or right. If this is the case, the solution is to shorten or lengthen the cable by a tiny, tiny amount, which is done by twisting the long cylindrical tube highlighted in blue, below, a quarter twist at a time. No dismantling [hopefully] required!
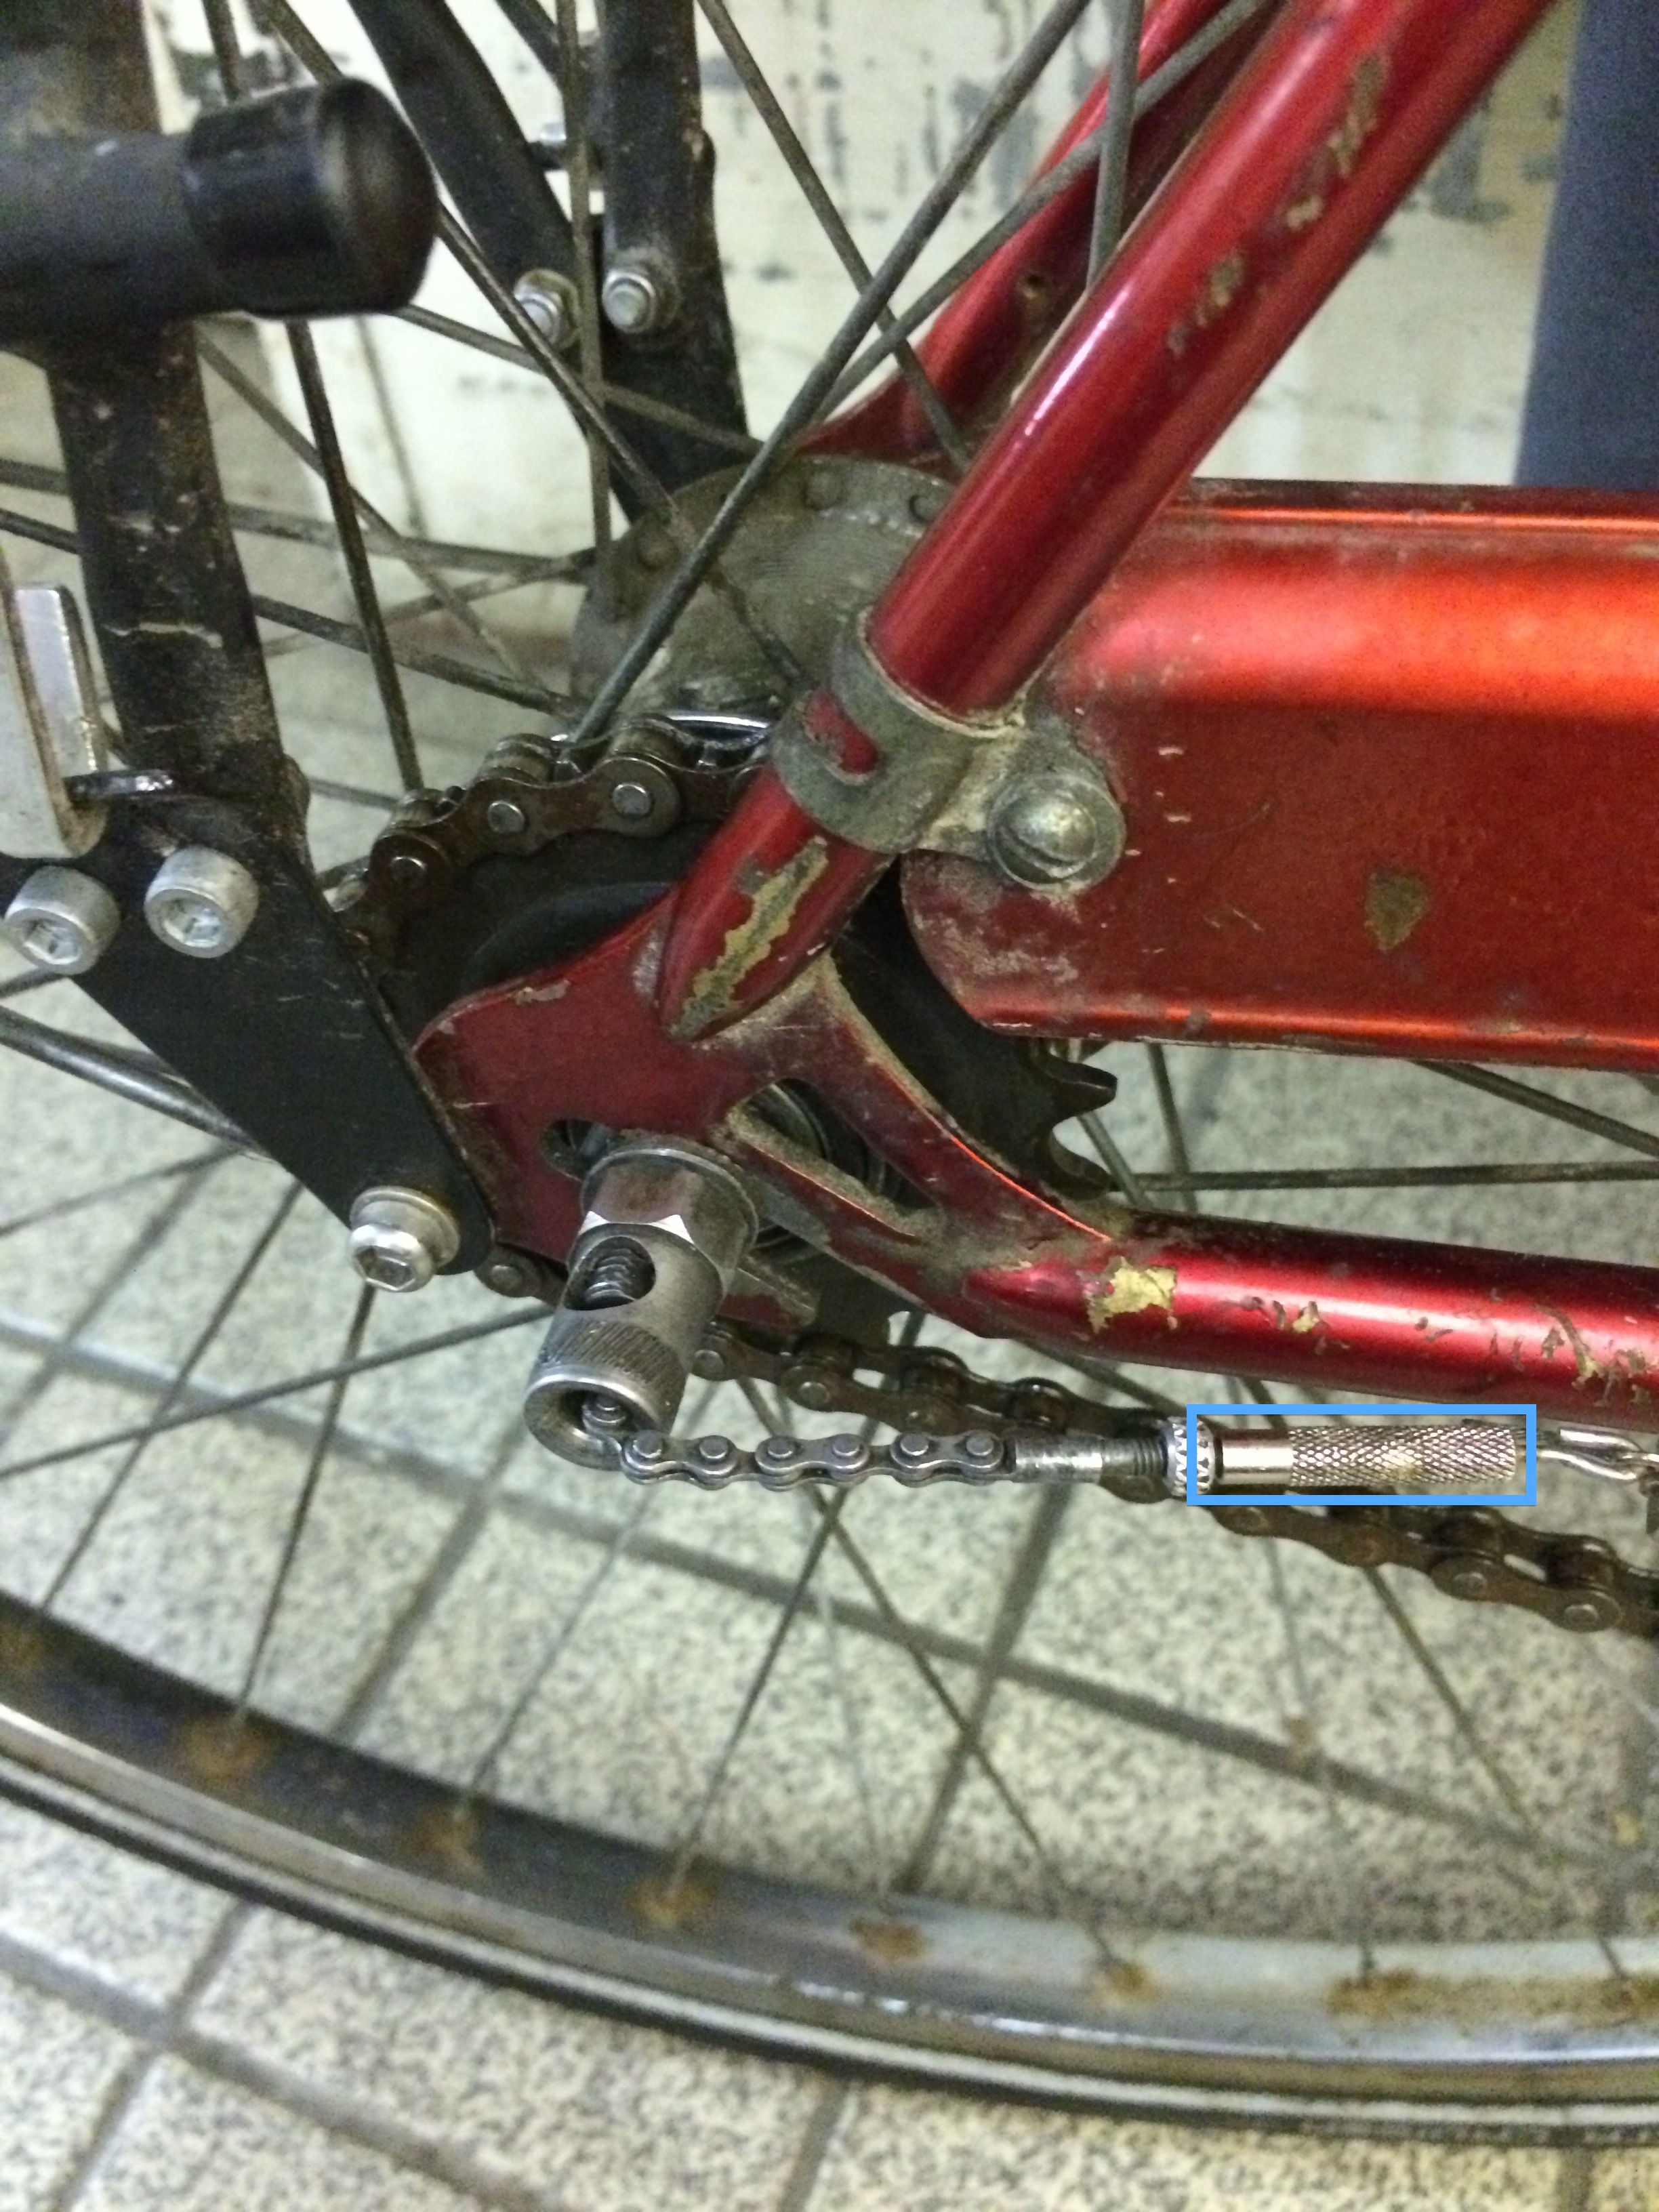
Though, if you decide to try this at home, do please test the results before cycling off and ending up with a two-speed bicycle with a shifter that lies. Learn from my mistakes.
It can seem scary to jump in at the deep end, especially with something like bike mechanics, but I’m very glad I did. I had loads of fun, learned something I could immediately use on my own bike, and built my mechanical confidence as a result. My skills have not suffered from having been learned in a strange order – if anything, starting with a topic of great interest to me encouraged me to go further and learn more.
by Steph
Broken Spoke volunteer (Greeter & Team Beryl member)
